From the panel in the screenshot you can see above I was then able to drag this over to my timeline and then effect is then added. I decided to add the Warm Overall to the 'We Should Stay Friends' clip. The screenshots below show the before and after of this.
Before:
After:
As you can see from these two screenshots the 'After' screenshot uses more oranges and hence the guys face seems much warmer were as the 'Before' image looks much colder. As mentioned above this effect was added as a simply personal preference and I feel the clip now looks much better.
The next lumetri look I added was to the clip directly after the above, this is 'Housekeeper'. I decided to add the 'Warm Midtones' look. This is very similar to Warm Overall however this look only warms the midtones rather than the clip as a whole. This was added to my clip in the same way which I mentioned above. The screenshots below show the before and after of this.
Before:
After:
As you can see from these two screenshots the 'After' screenshot uses more oranges and hence the guys face seems much warmer were as the 'Before' image looks much colder. As mentioned above this effect was added as a simply personal preference and I feel the clip now looks much better. This lumetri look is more subtle than the previous and this appeals to me.
The third lumetri look I have added to timeline is the Warm Overall. I decided to add this look to the 'HusbandAndBrother' clip. This is based on the fact the actors are wearing strappy tops and it hence looks like a warm scene. The Warm Overall look enhances this and I hence feel this is worth adding for personal preference as well as to enhance the scene. The screenshots below show the before and after of this.
Before:
After:
The forth Lumetri look which I have added was to the 'What Shall We Do' clip. The look which I added was 'Warm Gamma Mix'. This works similarly to the previous in terms of warming the overall appearance. This was added to my clip in the same way which I mentioned above. The screenshots below show the before and after of this.
Before:
After:
From the above screenshots the difference between these two clips seems very slim however when you look at this aspect on Premiere you can see the difference is much greater. This was the last Lumetri look which I have used. From here I then went on to looking at the actual Video Effects. The first one which I decided to add was a brightness and contrast. The first thing to note about this that the Lumetric looks have no editable settings where as the general Video Effects allow you to adjust various features based on which effect you chose to use. I added the Brightness/Contrast effect onto the Paris Scene 3 clip. This was an evening clip already however I wanted to adjust the brightness and contrast to make this clip appear slightly darker. The settings I changed to achieve this look can be seen below.
The screenshots below show the before and after of this effect.
Before:
After:
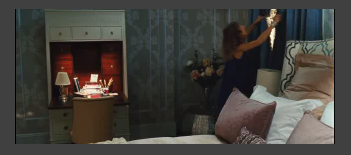
The next effect which I have added to my DVD Trailer is Color Balance. Using this effect I was able to adjust the Reds, Greens and Blues in the clip. I decided that I would try to make it look like a blue shadow with a general red tint to make the room look like it is decorated differently. The screenshot below shows the settings I changed to create this look.
The screenshots below show the before and after of this effect.
Before:

After:


No comments:
Post a Comment