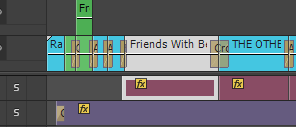
Premiere - Extras To Improve The Readabilty Of The Timeline
From the tutorial which I previously followed I found ways to improve the readability of my Premiere timeline. These really helped when it came to finding out which clip was which as I was able to add labels. I added these labels in the same way shown in the tutorial. The screenshot below shows my timeline with these labels added. You can now clearly distinguish between each aspect for example all of the voice overs from the clips are labeled in the colour Rose while all of the song clips can be seen in Violet.
The next aspect which I added to improve my timeline was to group the video clip with the sound clips which accompany this. I had previously ungrouped these to help me move and edit my timeline however now they are in the correct place and with the relevant video clip it makes sense to group them together again. Like in the tutorial I simply used the group button which can be found after a right mouse click. The screenshot below shows these elements grouped back together.

The final aspect which I took from this tutorial and used for my own timeline was the markers. I followed the same technique which can be seen in the Hints And Tips Tutorial blog post to add these markers to my timeline. Adding markers across my timeline really helped as I was developing my trailer. I was able to add transitions and effects and then use the markers to show where I was up to so that when I came back to look at my timeline I could clearly see what I needed to do next. The screenshots below show the details of these markers and then the markers on my timeline.


No comments:
Post a Comment